This is a continuation of my previous post “How to optimize your Blog images”. I will explain in detail how to optimize your Blog Images with Photoshop or XAT. If you don’t have any of these programs, there are some free image optimizers you can download from the web. In the end of the article you will find a link to a free image optimizer you can use online, for those who can’t download or install a program.
Photoshop:
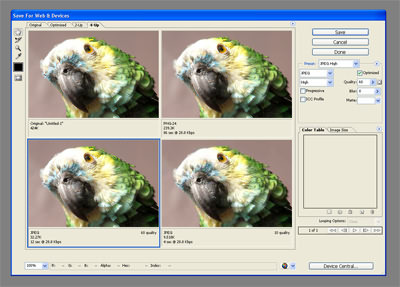
You can take advantage of Photoshop features and edit your images before you optimize them. You can play with the auto-levels or auto contrast tools in Image Adjustments, or adjust those settings manually. Hue Saturation is another great control you can play with, to give your photos better color quality. Once you are done, go to “Save for Web & Devices”. There you can select which image compression you want to use. I recommend using JPEG format for photos and pictures. For high quality graphics you can either use JPEG or PNG. When you optimize high quality images like a cute Twitter Bird with textures and shadows, try to look at the preview palette in Photoshop and check which format gives you the best quality with a small file size.
Usually JPEG gives you great results, however there are some cases when you have text in the graphics and it gets blurry in JPEG. So in that case it’s better PNG-24 or PNG-8 with 256 colors. Another advantage of PNG is that you can have images with transparent background. Only use GIF for low quality images or graphics with a few colors. Otherwise, you will get a huge file size with GIF. You can click in the sample above and see that the best option was JPEG. In that image I got excellent quality with only 30KB file size, while the PNG-24 had a bigger file size. Remember, after optimizing your image, never edit it again. You can save your original and not optimized image as PSD to have a copy of it in case you need to make changes.
XAT Image Optimizer:
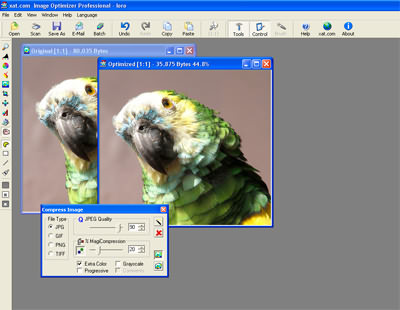
If you don’t have Photoshop, this is a great alternative to optimize your images. It does a great job with JPEG compression. One of the best features is that you can compress many images at once. For example, you can drag and drop 20 images and compress them at once in seconds.
So, to optimize my JPEGs, I usually set 90% Quality and 20% Magi Compression like in the image below. In this image I went from a 80KB file size to 30KB, and it’s quality remain intact. Even If I zoom it 400%, it’s hard to tell the difference.
If you work with pictures and design, Photoshop is the best alternative in my opinion. If you are just looking for an optimizer, then go for XAT. And if you can’t or you don’t want to install any programs, the best option is to use this useful online tool to optimize your images.
Happy Blogging! 😉


Pingback: Wp Themes Planet » How to optimize your Blog images
Good post, thanks.
Hey, great post, really well written. You should post more about this.
Great article!! Thank you very much! I really appreciate sharing this with us!
Regards
hello you need to post some pictures about image optimization:)